SPD cleats are attachments many professional mountain bikers use because they use a pedal specifically designed to give them as much efficiency as possible. Clipless pedals do not have the typical toe clip or the strap to lock your feet to the pedal, making these cleats essential to their use. In this article, we’ll cover what these cleats are, how to install them, and some tips on the positioning.
What Are SPD Cleats and How Do They Work?
These cleats attach to the underside of the sole of your bike shoes, and then connect to the pedal itself, physically locking you directly to the bike. This means every movement of your leg directly translates to the pedal, leading to increased power and efficiency from the energy in your legs.
SPD cleats are but one of the designs, and the most popular. However, SPD style shoes do not come with the cleat pre-installed, and the instructions can be confusing for anyone new to the sport. So to follow, here is a simple explanation of how to install SPD cleats on your mountain bike shoes.
How to Install SPD Cleats on Mountain Bike Shoes
If you prefer a video explanation then check out the one below from GMBN, or for the written instructions check out below the video!
Installing SPD Cleats Video Explanation
Installing SPD Cleats Written Explanation
To begin with, you will need shoes, cleats, and the parts that come with them, as well as a hex wrench or bike tool. Installing them is relatively easy and only gets easier with practice. So without further ado, here are the seven easy steps to attaching and installing your SPD cleats.
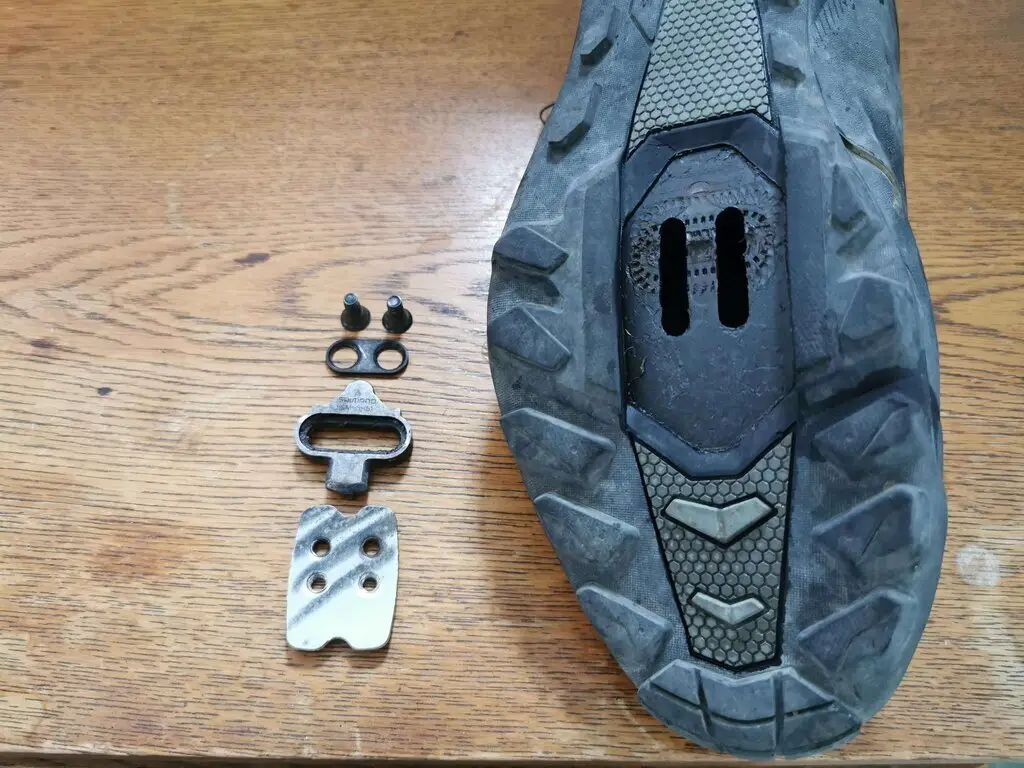
- Turning your mountain bike shoes over, you’ll see a cutout in the sole, with two bolts in the center. Remove this bottom plate using the hex wrench or bike tool. This is where the cleat is attached. Some shoes will come with this bottom plate removed in which case you can ignore this step.
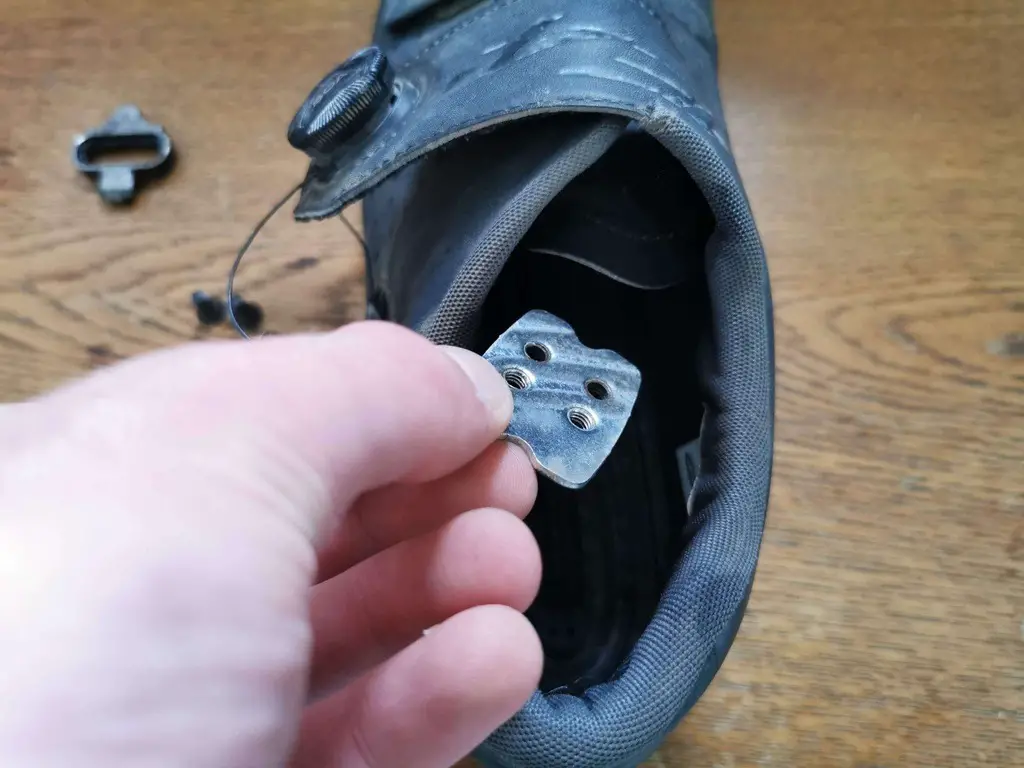
- Removing the plate, you can now install the base plate that comes with the cleat. Insert the base plate into the slots at the bottom of your shoe. Should there be a base plate already installed, leave this step out, as the one that comes with the shoe is specifically tailored for your shoe model and will work better than an attachment. The plate is installed underneath the removable sole of the shoe with the protruding screw holes facing the bottom of the shoe.
- The next step is to decide whether you require a spacer between the shoe and the cleat. If you find when clipped in that the rubber sole of the shoe catches on the pedal cage and makes it hard to clip in and out then a spacer is required. It will sit the cleat further away from the sole of the shoe giving you a bit more space from the rubber soles.
- Position the body of the cleat over the metal plate and protective plate.

- Now insert the inside portion of the cleat, aligning it with the holes in the base plate and shoe.
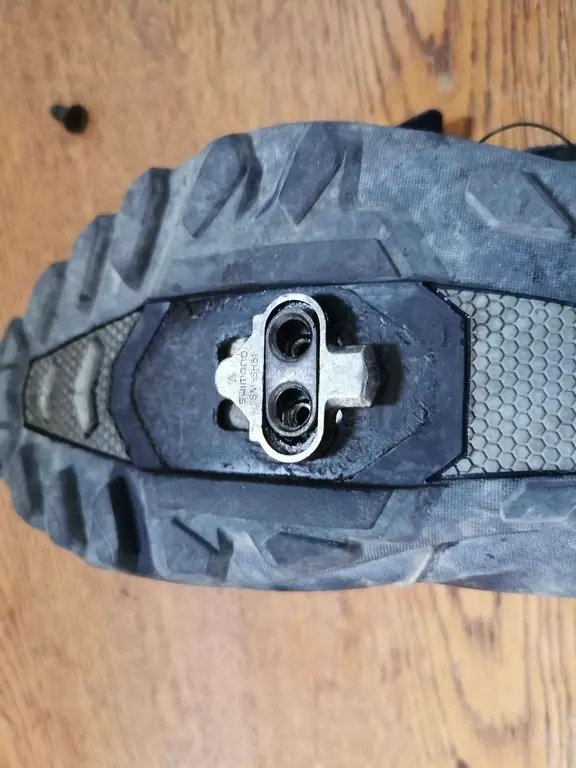
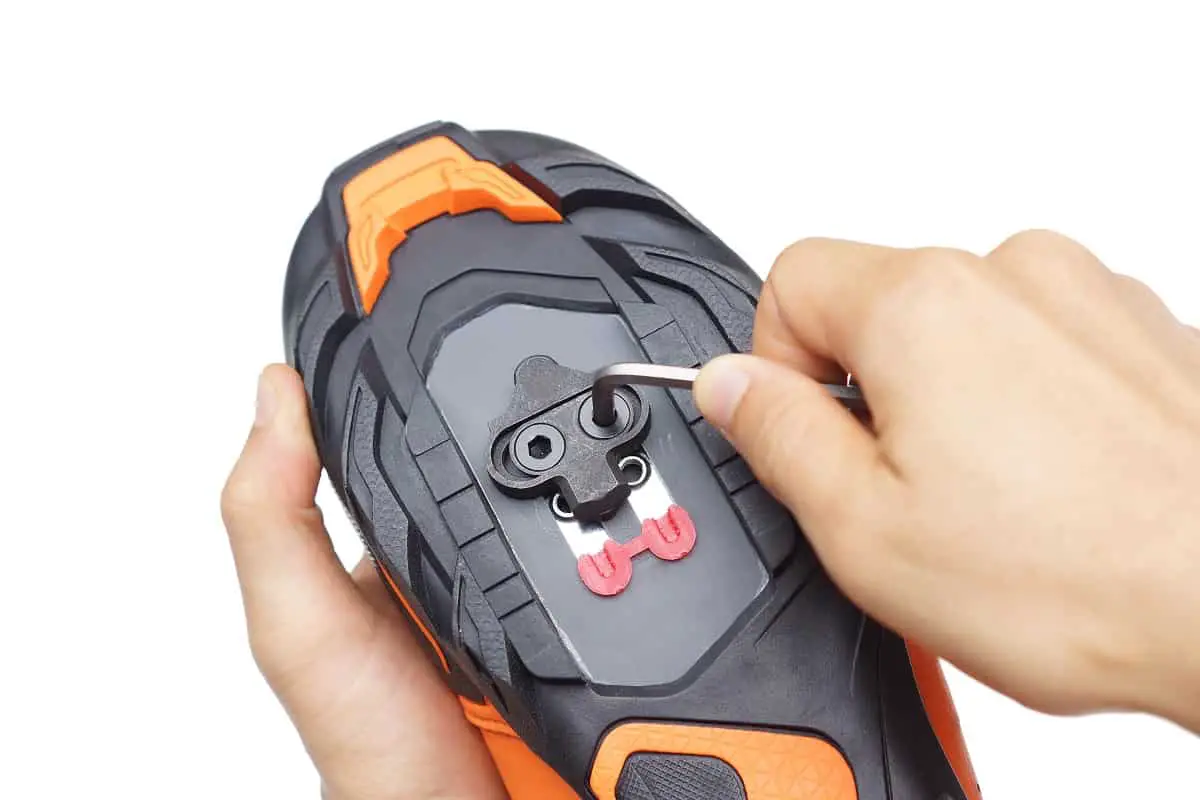
- Next, insert the bolts that come with the cleat and tighten them with the hex wrench to be snug but not impossible to move by hand. Once attached to the base plate, you can align it to be in the position most comfortable and beneficial for your feet while biking (the next section covers potential positions).
- Once in a position ideal for you, you can make the final tightening with the hex wrench, making sure it is tight. Because of all the twisting and lateral movement involved with the sport, it has to be tight to prevent additional damage, as well as to allow your feet to twist out of the pedal easily. If too loose, you’ll go to twist out and find your foot stuck, and then it is a whole other process to free you, and this can be very embarrassing and tedious.
Now that we know how to install the cleat, there is something to be said about positioning. Everyone places and uses their feet slightly differently when mountain biking, but there are some ‘ideal’ positions that incorporate ideas of biomechanics and efficiency from your calf muscles.
How to Position Your Cleats for Mountain Biking With Clipless Pedals
One feature of cleats is your ability to slide and adjust them on your shoe. This allows you to customize where you place your feet and lets you determine the best placement that will enable you to most efficiently put your leg muscles to work.
The common misbelief is that the cleat should be placed far forward, under the ball of the foot, and this is a good idea if speed is what you want. However, for mountain biking, your stability and endurance are just as important, and adjusting the cleats can make a big difference in this regard.
From a biomechanical point of view, taking into account our muscle structure, having the cleat further back puts less strain on our calf muscles when cycling. This allows you to go for much longer distances, as you aren’t exerting additional force on your legs, letting you pedal more efficiently and for longer. It will also improve stability as you are using your quads more than your calves for cycling, with the quads being more important overall for the activity.
Does this mean you should adjust the cleats all the way to the back? By having the cleat further back, your heal will naturally drop down which provides increased stability on the bike. It will be particularly noticible when riding steeper, more technical terrain.
But as stated earlier, we all cycle slightly differently. Having cleats to the back may not be as efficient for you. You might already have excellent natural stability and endurance, so increasing these factors does nothing for you. For this reason, it is most recommended to keep the cleats anywhere from the middle to the back when you aren’t looking to sacrifice everything for speed. Fiddle around with different adjustments to find the right position for you.
Conclusion
Installing SPD cleats gets confusing when you don’t have a guiding hand, but it’s easy to get the hang of it. Follow the above instructions, and keep in mind that your cleats should be anywhere from the middle of your foot to the back, as this provides the most balanced approach between stability and endurance, and trains your muscles for the sport!
If you need some more help installing MTB pedals, check out here.
