A stripped bike pedal can be super annoying and potentially costly to fix, thankfully there are a number of ways cranks can be fixed without having to purchase a new one.
Here we go in-depth into the different ways to fix a stripped bike crank thread depending on how badly stripped they are. We’ll also explore ways to avoid stripping threads on your bike, so you don’t have to worry about it again!
Types of Pedal Thread Repair
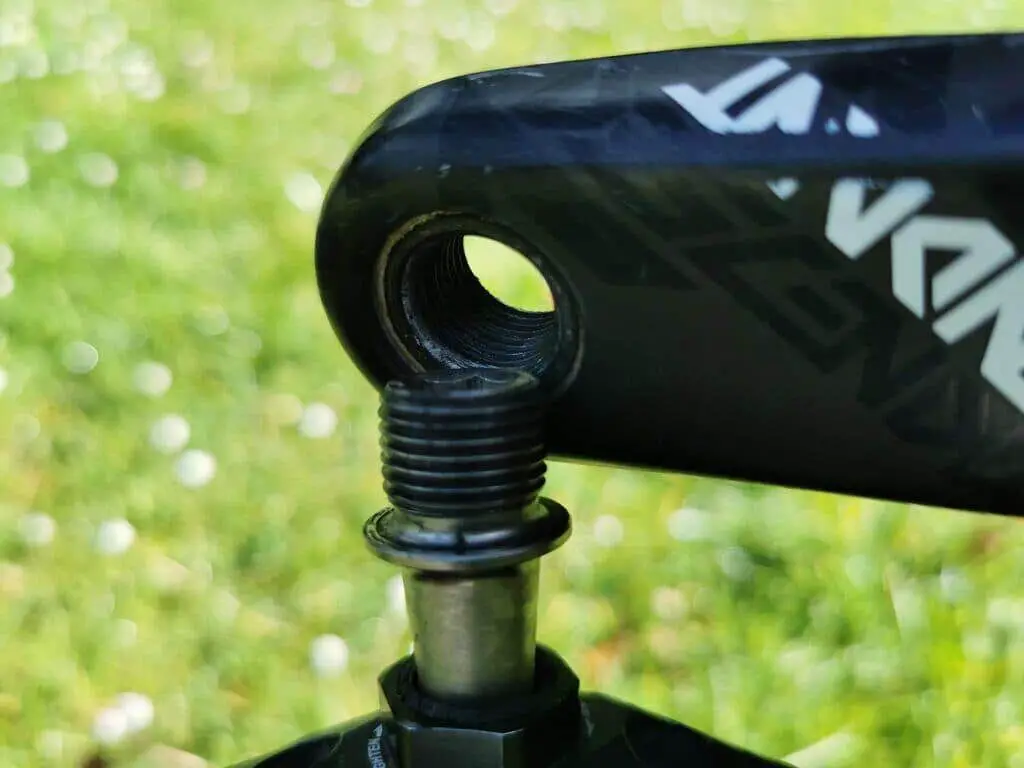
There are two types of pedal thread repair that can be done. The first is for minor damage to the threads or when the threads need cleaning out. This is done with a bike pedal tap and doesn’t involve cutting any new threads. This is best done to bikes that have been cross threaded or are just full dirt and need a good cleanout.
The other is for crank threads that have been completely worn down. For this new threads are cut into the crank, and an insert is added for the pedal to sit in. This is much more involved and is best done by a bike mechanic.
Crank Pedal Tap
Pedal tap tool for restoring slightly damaged crank threads. Comes in both 9/16" and 1/2" thread sizes.
The crank pedal tap such as the Park Tool TAP-6 Pedal Tap is great for fixing damaged bike crank threads. The tool is often called a crank thread chaser and is used to restore the required thread shape within the crank.
It works by being made of strong high carbon steel which resembles the thread of a bike pedal, and when threaded through the crank, it carves/cleans out the thread and restores it to the correct shape.
The tool is excellent for old cranks that have become out of shape, for cross-threaded cranks, and for pedals that often cease onto the crank. It is common for pedals to become loose within the crank and often just running a pedal tap through the crank will clean up the threads and stop the pedal from moving around when pedalling.
How to Use it
The pedal tap is super easy to use and doesn’t require any special skills. It’s as simple as installing a pedal.
First, make sure you determine which one is the left and the right pedal tap. It is also a good idea to get some oil and apply it to the crank and pedal tap to help it go through smoothly.
Next line the pedal tap at a right angle to the thread of the crank and begin to screw in the thread. Once the thread catches and starts entering the crank, do a half turn forward and a quarter turn back.
Repeat this until the tap has gone all the way through and is sticking out the other side of the crank.
Then simply unwind the tool back out, and you are done.
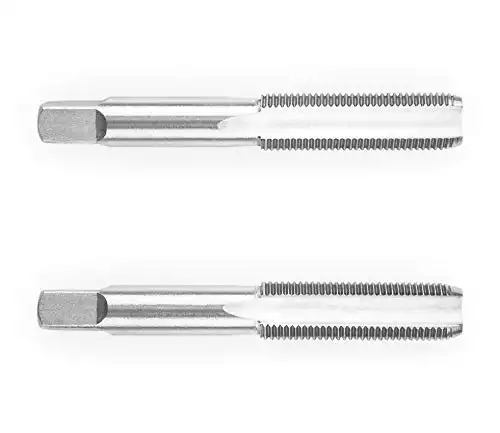
New Thread Inserts
This is best used for aluminium cranks and involves using a thread cutting tool that cuts an entirely new thread into the crank. A new thread insert is then installed into the crank which then has the correct thread for the pedals to be installed.
The thread inserts look like the one below and are needed as the new thread cut is wider than the thread on the pedal, hence it requires an insert to allow the pedal to be reinstalled.

This is an excellent option if the threads on your crank are completely worn out and can’t just be tidied up with a pedal tap.
Threading new inserts onto a crank is a much more involved process than using a pedal tap and the kit required to do it is much more expensive. You are much better off getting it done by your local bike shop, and it will most likely be cheaper than buying the full kit yourself.
The video below shows how the new thread is made and how the insert is installed.
Why Is My Bike Pedal Loose?
A loose bike pedal is annoying and certainly doesn’t inspire confidence when you are out on the trail, thankfully there are a few common issues that can crop up which cause a loose pedal.
First of all, it could be caused by the incorrect tightening of the pedals which is an easy fix, typically pedals will require a torque of between 20-40 Newton meters.
It is also possible that you have cross threaded the pedal in which case you will need to run a pedal tap through the crank to clean up the threads. You will be able to tell if this is the case as the pedal won’t sit straight in the crank.
Another common one is dirt or grime in the threads, again this is easy to fix, just clean the threads on your pedal and the cranks, and hopefully, that fixes the problem. If not it could be worth using a pedal tap as described above to chase the threads on your cranks and give them a clean bill of health.
Why Did My Bike Pedal Fall Off?
A bike pedal falling off can be very scary and dangerous, so it is best to avoid it by regularly cleaning and maintaining the threads on the pedal and crank.
However, it can happen and is most likely caused by the crank threads being stripped out, and therefore the pedal has nothing left holding it in place. If you have an aluminium crank, then it is possible for the crank to be fixed by creating a new thread with a rethreading kit as described above.
What Causes a Crank Thread to Strip
There are many ways that crank threads can become stripped, but by far the most common way is through cross-threading the pedal thread when installing the pedals. Cross-threading a pedal is when you install the pedal on an angle, and the pedal threads cross the crank threads which wrecks the thread on the crank.
Thankfully if you have an aluminium crank, then cross-threaded cranks are easy to fix with a crank thread chaser.
Another common way that crank threads are stripped is by not tightening the pedal enough when installing it. A loose pedal can move around slightly within the crank threads and overtime this wears the threads down.
Depending on how long it takes you to tighten the pedal it can mean that the threads within your crank are completely worn down. If this is the case, the cranks can most likely still be fixed, but it is not as easy as a stripped thread.
If you have an aluminium crank, then a new thread can be cut out and installed which can avoid the costly exercise of having to purchase new cranks.
How to Avoid Stripping a Bike Pedal Thread
There are two main ways to avoid stripping a bike pedal, and they are super easy to do and mostly require just taking the time to install the pedal correctly.
Check out our guide on how to remove and install bike pedals.
Cross-Threading
The first and most common way that pedal threads are stripped is by installing the bike pedals incorrectly. Typically this is done by cross-threading the pedals.
To avoid this, make sure you install the pedals straight and never force a pedal when initially screwing it on. It should only become stiff when it is threaded most of the way on.
The same can occur when trying to install the pedal on the wrong side, be sure that you install the left pedal on the left side and vice versa. Again never force it and always double-check that it is the correct pedal for that side.
Tighten it Up
Ensuring that the pedal is tight enough will make sure that any wear within the crank over time is limited. When installing the pedal, make sure that you tighten it to the manufactures torque outline. This usually means a good firm push to tighten (usually 20-40 Newton-meters).
It is also important to regularly check that the pedals are still tight on the crank. It can also help to apply a bit of grease to the pedal thread every now and then to prevent the thread wearing down over time.
Conclusion
Well, there you have it, that’s all about stripping bike pedals, and more importantly, how to avoid it. There’s nothing a bit of maintenance and TLC can’t fix. Let us know in the comments if there’s anything we missed or if you tried any of these methods.
For more on bike pedal thread sizes, check out our guide to the different pedal thread sizes.
For more on the different types of bike pedals, check out the in-depth guide here.
