In this Blackburn Outpost Elite bikepacking bags review, we will look at the seat bag and handlebar bag to see if it is right for you and your next bike packing trip!
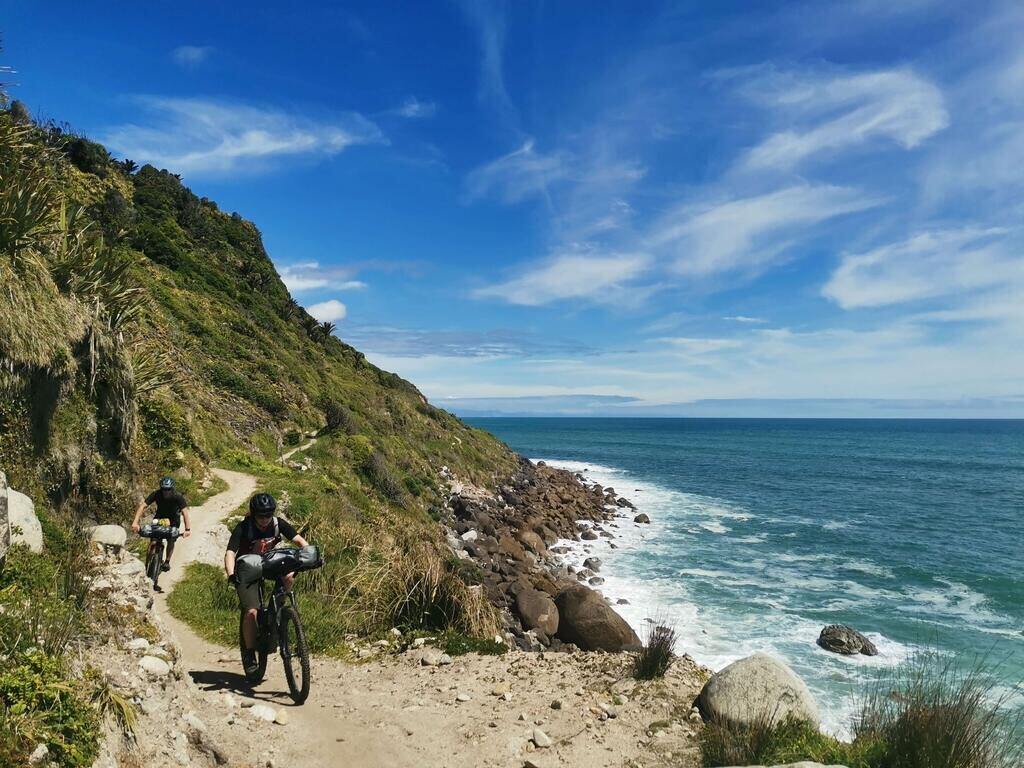
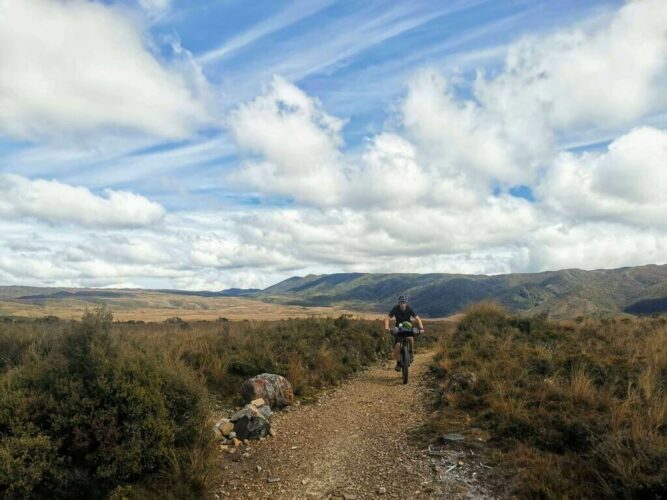
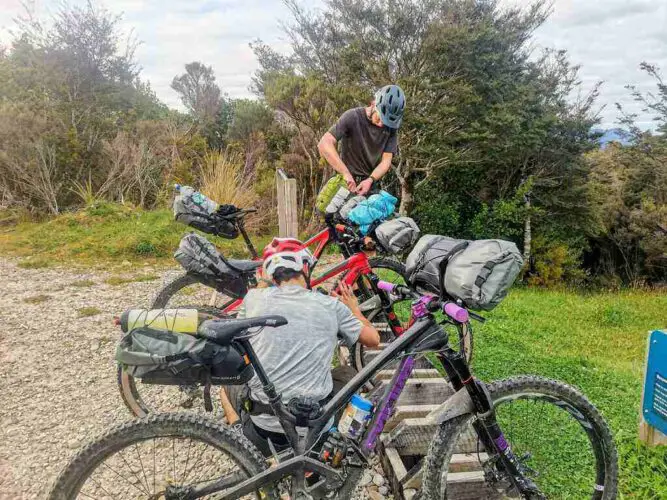
In November this year, I (along with two others) recently undertook a bike packing mission up the West Coast of the South Island of New Zealand. It involved just over 400 km of mostly single track, including two well-known bike tracks in New Zealand (the Old Ghost Road and the Heaphy Track), a fair bit of off-road, and a tiny bit of on-road, over the course of 4 days.
This was a self-supported mission (with a few cafe stops along the way), so we had to carry four days’ worth of gear. And to make it a bit more challenging, we did it all on enduro bikes. Enduro bikes are long travel full-suspension bikes, designed for downhill riding (not endurance riding). So for this mission, we needed some decent bike packs.
For this ride, all three of us opted for the Blackburn Outpost Elite bikepacking bags. We had all undertaken some form of bike packing previously, so we knew that we didn’t want to carry everything in hiking packs for four days straight.
Why the Blackburn Outpost Elite Bags?
The reasons that we all went for these bags is because:
- They fit our enduro bikes.
On full suspension bikes, the frame and seat move with the suspension. Because of this, we needed to keep the bags out of the way, yet secure. (Note that these bags also fit bikes with no suspension).
- The bags provided plenty of storage, so we didn’t need to take much on our backs.
Four days of biking leads to a sore butt and a sore back. We didn’t want to make this any worse than we needed by having weight on our backs!
- The bags offered good storage for the price.
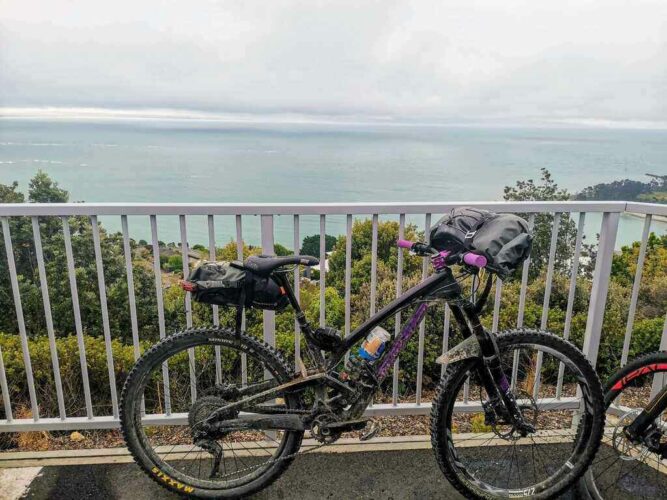
The two bags together offered around 25 L (10.5L for seat bag, 14 L for handlebar bag). This presented one of the best storage for money we could find.
The other aspect we were sold on was the durability of the bags. Weathertight exterior, welded seams and all the external storage you could ask for also helped! The west coast of New Zealand is well known for high rainfall- and given we had booked this trip well in advance, we had little hope for fine weather the whole time!
All of these selling points held up. All of our gear stayed dry (at least while it was in the bags), the seams never exploded (despite how tightly some bags were packed), and the external storage came in handy numerous times.
Blackburn Outpost Elite Handlebar Bag review
Pros
- Air Valve to help compress the bag
- Doesn’t rub against the frame
- Tough and durable dry bag
- Lifetime warranty
Cons
- Clamp too large for largest diameter handlebars
This is a well-designed setup, to say the least. It didn’t have many of the issues you typically have with a handlebar set up- such as the cables being crushed, the bag hitting the wheel when the suspension compresses, and difficulties in using the brakes.
The Setup
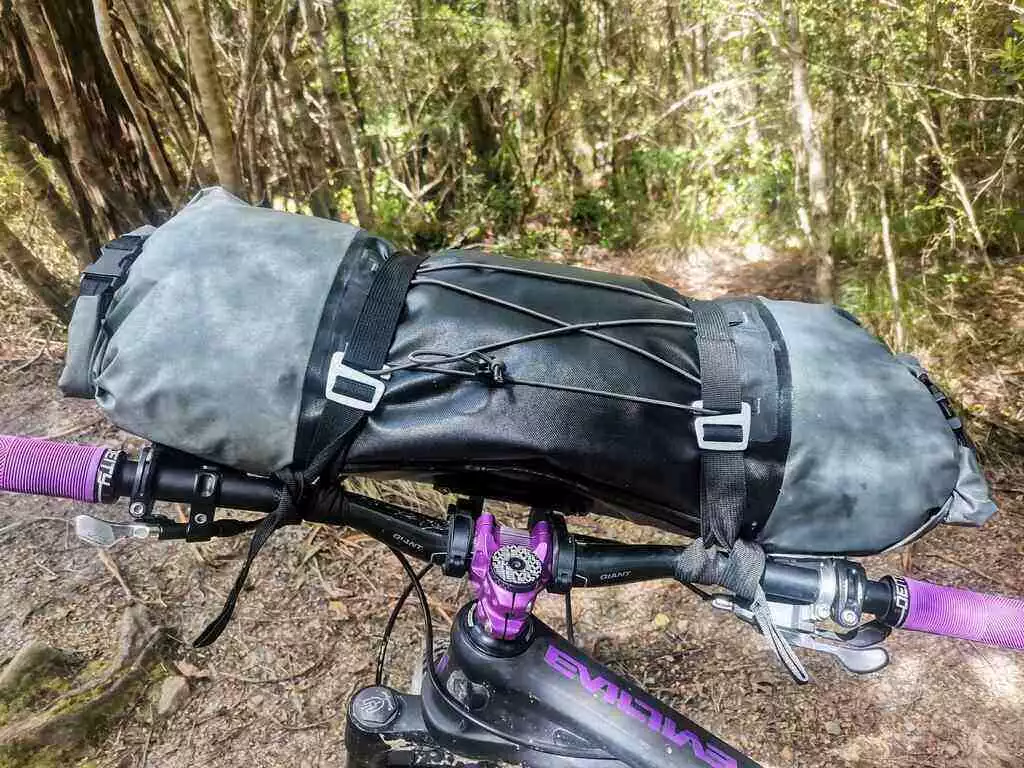
The Blackburn Outpost Elite Handlebar setup clamps to your handlebars. It then has a bracing system that holds the bag out from your bike. It is very easy to put on. The clamps screw on around the bars – similar to attaching lights, brakes or anything really to your handlebars.
The dry bag then sits on a little platform and is tied to both the platform and the handlebars. We put the bag through its paces, and can confirm that the bag will never separate from the bike!
One thing we did do was purchase a set of frame stickers. While we rode, we noted where the setup caused our cables to rub against the frame. A couple of stickers went on, and that solved the problem. This is an issue you will find with any handlebar bag, and I would say that it was significantly minor compared to what my mates had with their (different brand of) bags.
Just as a word of warning- do NOT use these on carbon handlebars! Carbon bars are slippery and brittle. This means you can’t tighten the clamps on the bars too far or your handlebars may crack. Or they can slip around, which may damage part of your headtube or frame! (It does say this on the packet- but I may have been a little enthusiastic to take the setup for a spin, and ended up scraping up my headtube. I swapped out my carbon bars for some alloy bars, and it worked much better.)
The Amenity Factor
The dry bag opens at both ends! So you can access your gear easily and quickly while the bag is still attached to the bike.
We packed our gear so that the least needed items (such as evening meals/clothes) were in the middle of the bag. And the more frequently used items were packed towards the openings. Things like raincoats and food were super easy to grab without detaching the dry bag from the bike for quick access.
After a long day of biking, you simply unhook the dry bag from the handlebars to take it off the bike. No fuss at all!
To do up the bag, you roll the ends like you would a normal dry bag- except it has a one-way air valve. This allows you to easily compress the bag, getting all the air out and ensuring it is very compact. The valve is a huge time (and space) saver, and the usefulness of this feature cannot be emphasized enough!
The top of the bag features elastic bungee cords, which came in useful for wet items such as a raincoat, or the shorts we swam in the day before! I could also see it being useful for maps or food or anything you want easy access to.
What we didn’t like
As handlebars come in different sizes, the bag comes with rubber inserts so that that clamp can fit the various sized handlebars. The rubber works well to prevent slipping of the clamp on the bars. However, for those of us with 35 mm handlebars (the largest size, which doesn’t require rubber inserts), the clamp doesn’t quite do up tight enough. This resulted in the bag and the bracing system slipping on rough terrain.
This meant we had to stop often and adjust the position of the handlebar bag. And for super rough, fast descents, I would angle the bag to be right on top of the bars to prevent it slipping around. This was a very temporary solution though. The better solution was to use a bit of electrical tape to fatten the bars so the clamp was tighter!
Blackburn Outpost Elite Seat Pack Review
Pros
- 10.5 L
- Handy storage you wouldn’t notice
- Air valve to help compress
- Waterproof and durable dry bag
- Easy to access items while attached to your bike
- Works with dropper posts (without damaging it at all!)
Cons
- Clear out any stones in the pouch before putting the dry bag in!
- Can’t drop your seat when using a small bike with slack geometry!
The Blackburn Outpost Elite seat pack and dry bag give you an additional 10.5 L without you really noticing it is there! The harness system is secure, takes a reasonable amount of weight, and stays well clear of the seat post!
The Setup
The entire system is only attached to the underside of your seat. It uses an aluminum frame to distribute the weight across the underside of the seat and angles the bag out and up. This keeps the bag well away from your seat post, and importantly your seat post dropper if you have one.
The dry bag tucks into the ‘pouch’, and sticks out behind the seat which you will never notice while riding!
The end of the dry bag rolls up and you use the buckles to attach it to the pouch. It is as simple as that!
The Amenity Factor
Just like the handlebar bag, it is easy to access gear from the seat bag while it is attached to the bike. Again, we packed strategically so that the items we needed most were at the opening end.
The bag again featured an air valve which, again, its usefulness cannot be underestimated! Two of us went for the tactic of packing the heavier, smaller items in the seat pack, while the other member of our crew chucked his clothes in the seat pack. The clothing was lighter and allowed the seat pack to be stuffed much more aesthetically, as you can see on the middle bike in the photo below.
Other than aesthetics though, we didn’t have any issues with the heavier load in the seat pack. The rear bungee even held a drink bottle for us with no problems.
What we didn’t like
Make sure you clear out the pouch of any stones or debris before you put the bag in! One of our team left a stone in the pouch with the bag in, which wore out a hole in the dry bag which was less than ideal! While we can’t really blame the bag for this one, do take care with this, as it is easy to happen!
The other thing was that my small framed enduro bike sat too close to the rear wheel for me to drop my seat with the bag on. This wasn’t a major, but is something to keep in mind if you intend to use a slack geometry, small-framed, enduro bike on downhill trails for your next bike packing trip!
To buy or not to buy?
The handlebar bag is an excellent choice for a large volume of storage- think tents, sleeping bags, plenty of clothing and the like. The handlebar bag meant we didn’t need to wear large backpacks to carry anything (I had a 10L Camelback – similar to this, mainly to carry my bladder for water, and the other two had belts that simply carried some food and phones).
I wouldn’t buy it if your trip is dominated by tight switchbacks on steep descents. This was the one place it was difficult to ride with the handlebar bags (especially if there are high consequences of falling). Or if you are riding super rocky or rough terrain, as the bag with a bit of weight can rotate around which can be annoying.
The seat pack is probably still my favorite storage solution. You didn’t know it was there while riding, and when compressed (using the handy air valve) you can fit a huge amount of gear. I’d use it again if I was even doing a large day trip where I needed to carry a bit of stuff (raincoat, emergency gear, first aid kit and the like) instead of a backpack.
I wouldn’t purchase if you intend to use a seat dropper on a small framed full suspension bike. You won’t get the use of the seat dropper as the bag will hit the tire when the suspension compresses. A bit specific, but I genuinely cannot otherwise fault this bag.
Final Thoughts
All three of us on the trip agreed that the bags were lifesavers. By which we meant they saved our backs and butts from getting very sore on the four-day expedition. We put these bags through some pretty rough terrain, including a few crashes, and they very much did the job.
Bikepacking can get tiring, and always need to access your gear more often than you think. So you want some gear that has easy accessibility and is easy to reattach once you have found what you have needed- especially when you are tired. The Blackburn Outpost Elite certainly excelled at this!
If you liked this Blackburn Outpost Elite bikepacking bags review, and want some more mountain bike-related content, have a look at the Troy Lee Designs A3 Helmet review, Giro Source Helmet review, and the Bell Super Air R (for all the helmets we wore on this trip).